Category Archives: Sensory Play Ideas

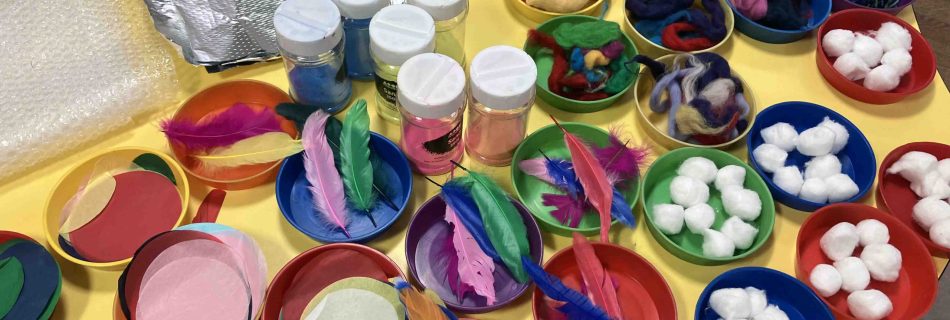
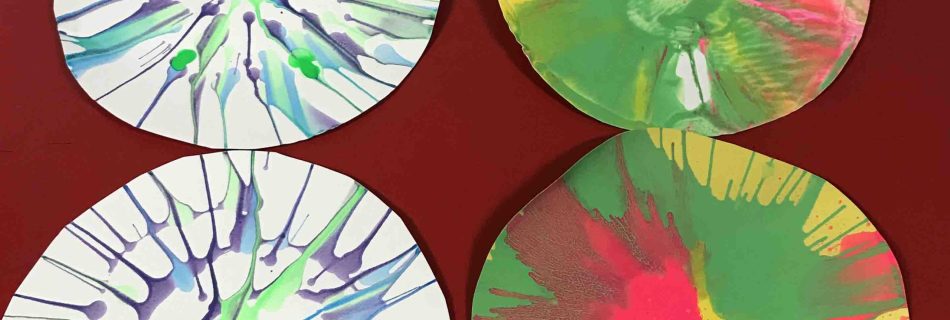
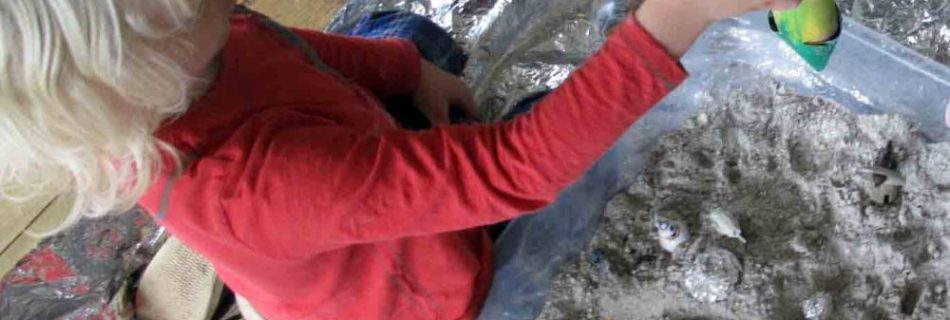
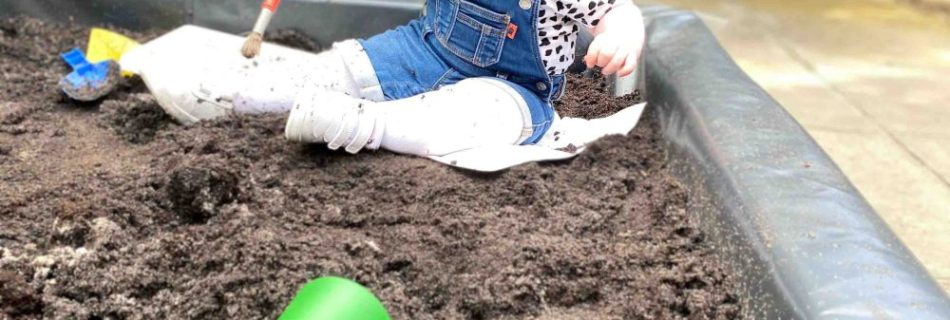
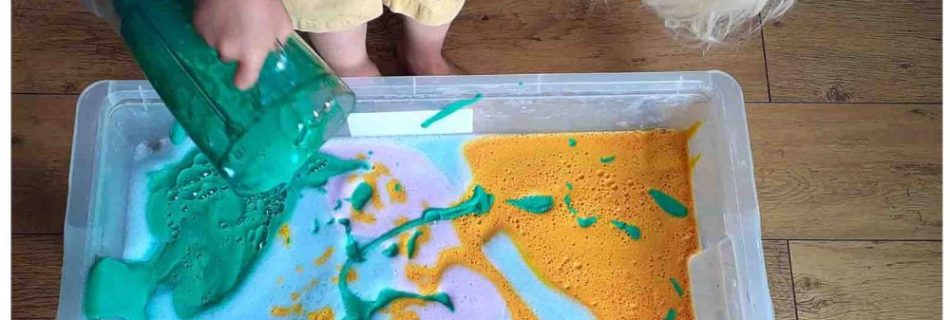
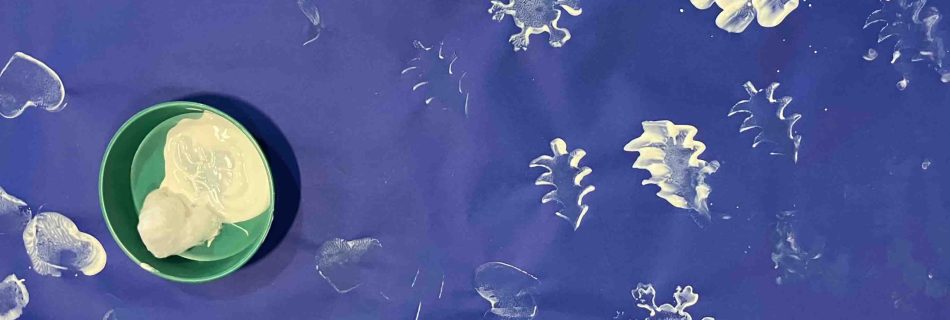
Snowy sensory play and painting

With winter weather outside we were using the snow as a prompt for our sensory play and art making today. It is probably too cold for very wee ones to spend much time outside this week so this is a nice way they can join in. As always, let them lead the exploration and show you what they are interested in.

For our sensory tray we made cornflour snow. This is a nice recipe as it is safe to taste and has an interesting texture. It can pack tightly into balls, or to build walls and domes in the sensory tray, but then it easily crumbles back up to be soft and fluffy again. It even makes the same crunchy sound as real snow. To mix it, use enough cornflour to fill a storage tray or baking tray (maybe a few boxes will be needed). Then drizzle in sunflower oil slowly, mixing as you go until the flour stops being powdery and fly away and starts to hold together. It usually takes about half a cup of oil for a box of cornflour. You can also use baby oil for whiter snow, but only if they are big enough not to try eating it.

We added a mixture of snowy animals like mammoths, penguins and polar bears to our snow as a prompt to play, or you could add spoons and scoopers, cups for making mini snow domes, or natural materials like bits of pine.

In our session the wee ones were enjoying getting right into the trays. Luckily it washes off easily and the oil leaves their skin nice and sfot!

For paintings we offered large blue rolls of paper (you could use any size) and trays of simple white paint. We had fluffy cotton balls for printing with, along side some sponges and stampers. The cotton balls are fun as they can explore the soft texture and see how it changes after adding paint. They can use it to stamp snow marks or throw them onto the paper for a splat. If you don’t have white paint, you can make a simple white paint with just cornflour and water heated and mixed to a paste. See the recipe here.

Tactile art ideas

We had a lovely session this month with the Guide Dogs Children and Young People Service joining families in Edinburgh for their My Time to Play Group. This got us thinking about art making ideas that are tactile and use lots of different senses. The ideas would be ideal for wee ones with visual impairment but also bring some nice sensory experiences to art making for everyone.

We tried some of our favourite activities from the website like coloured rice trays and you can find a recipe for that here. We also tried printing using paint and different textures like corrugated card and bubble wrap. The feeling of sliding the paint over the bubble wrap is really nice. You can find instructions for the bubble wrap printing here.

We tried a new way of using our collage materials that allowed wee ones to feel all the different textures of the materials and then really easily and immediately (without much mess) stick them onto their art work. You need a square or rectangle of thick card which you then wrap with wide sticky tape or parcel tape, using the tape inside out so you are creating a sticky outside surface. You could also use a sheet of sticky backed plastic for this but tape is easy to find. This creates a surface that is tacky to touch that wee ones can explore and anything they add to it will easily stick on.

Offer wee ones a range of interesting different textures. We used things like feathers, snipped up wool, cotton balls, tinfoil, tissue paper and pompoms. You can see some of our materials in the image at the top of the page. If your baby is still putting things in their mouth make sure everything is safe and too large to swallow. Let them explore all the different feelings and then choose what they woudl like to stick on. We used a shake of coloured sand at the end to fill in any sticky gaps and add another texture. The final art works were interesting to explore with fingers.

Image of circular paintings with paint spraying in a spin pattern

Process Art – dripping, squirting, spinning

We had families back in DCA this week with their little ones and we were trying lots of different process art ideas – where the final result is a bit of an experiment using spinning or gravity to help us. These are lots of fun for big and small as everyone can enjoy the un controlled outcome. It does get a bit messy though so put plenty of paper down (or even try it in the shower!)

Spinning:

We used salad spinners to create these spin paintings. You need an old fashioned salad spinner (available in charity shops or cheap online) or you can also try with a record player or a ‘lazy susan’. Cut a circle of paper that fits into the base. You now need to help your little ones to drip paint onto the paper. Mix water based paint 50/50 with water to make them runnier. We put out paint into little mustard bottles so wee ones could squeeze them out themselves. Or you could put the paint in trays and use a dripper or medicine syringe to suck up the paint and let them drip it.

Now put on the lid and spin!

We had some amazing results

Dripping:

We also had lots of fun testing out different ways of dripping the paint. We had hung sheets of white fabric ready to drip onto but you could also tape paper to the side of the shower or to an outside wall.

Have some different methods of dripping the paint. We used drippers and medicine syringes again with our paint watered down 50/50. We also tried painting on thicker blobs of paint and then spraying them with water from a spray bottle till it ran down the fabric. This gave a really nice effect and is good for letting little ones experiment and see cause and effect. It’s also a bit safer in the house as they are only ever spraying water. If your wee one enjoys this they might also like to try our rainy paintings.

Squirting:

We tried putting large sheets of paper onto the floor and using the same drippers and syringes to squirt the paint from a height to get a fantastic splatting effect.

Moon Dust and Rockets

We are staying with the moon theme of this years Being Human Festival in Dundee and creating a lunar landscape with a sensory tray for wee ones. Then you could also try to create a rocket to use in the play from cardboard tubes.

You can watch a video with instructions for making the moon dust here https://twitter.com/ArtattheStart1/status/1327176251694575616

moon dust sensory tray       

Sensory trays are a great way to let wee ones try out new textures and if you add toys they can use their imagination to create small worlds. This moonscape for them to play in uses kitchen ingredients so it’s taste safe for the smallest babies but as always this is designed to be played together with a grown up.

  • Mix together cornflour and oil in these proportions. You can double up the recipe to get the amount you need. Mix with your hands till it is soft and crumbly. It should be possible to squeeze it into a ball and it will hold its shape, but then it will go soft again if you crumble it.


  • You can add other ingredients if you want it to be grey instead of white but this isn’t necessary. We blitzed up some oreo cookies in a blender or you could try cocoa, powdered paint, or edible glitter.


  • Tip it into a large tray like an under-bed storage drawer or a baking tray. Put a mat underneath as it gets messy. We used a foil space blanket to fit the moon theme.


  • Add some space themed toys or a cardboard rocket like below and then let wee ones play and explore. Balls of tinfoil make good asteroids.


  • Older children might like to experiment and see how craters are made on the moon by dropping in a heavy ball or a stone.

Rocket build 

Try this activity with your mini humans to create a rocket to visit the moon with. They could also use it to play in our moon sensory tray. Babies will enjoy painting if you make the rocket for them, but older toddlers will enjoy helping you to build it too. Always supervise when using scissors etc.

You need:

  • A cardboard tube
  • Some recycled cardboard
  • Glue or tape
  • Colourful water-based, baby safe paints

.


  • Use the templates here rocket template to cut out a nose cone and 3 or 4 fins from thin card. Cereal box card is ideal. Roll the cone and glue the tab to hold it in place.


  • Now use the tabs on the cone to stick it to the top of your tube. Then stick on the fins using their tabs. You can use glue or tape – masking or parcel tape is perfect because it is easy to paint over.


  • Now let wee ones decorate it with paint. Then allow to dry before playing


Enjoy your lunar explorations. You can share any art work you make with the festival using #BeingHuman2020


Muddy play

This week we are inspired by our collaboration with the Botanic Gardens and the amazing mud play area they’ve build us. You don’t need a giant area like this though, just some mud in a tray or storage drawer or an empty area of the garden to dig in will be enjoyed by children. Try to dress them so the play won’t be spoiled by either of you worrying about mess. It is fun to have some art materials like paper but also some toys for imaginative play and water to add to make it sensory. Give them lots of tools for mixing and bowls for holding it in. Try to follow the lead from wee ones and what they are interested in exploring as much as possible. Here are some ideas:


Have some bowls and scoops (just old kitchen ones are fine) for mixing and dishing out. A toy tea set would be amazing or some old pots.


Having some water for pouring will let them make foods and potions, mix paint or create a volcano like ours.


Add in some toys for imaginative play, like toy animals or dinosaurs or diggers and trucks. Children will enjoy creating small worlds in their mud area

You could try some muddy art work. The artist Richard Long used mud collected on walks to create art  works. In these he has made a huge mud painting on a gallery wall and a small work on paper with a pattern of mud finger prints.

If you show your wee ones that mixing water with the mud will make a paint you can let them experiment. It helps to have the biggest paper you can find. Even an old white sheet would do and give them lots of scope for some big splatters. Like us they could try making marks by splatting from a height, using a brush or just their hands.

    Or even their feet!

The important thing is to have fun getting a bit messy in this sensory and creative play and to enjoy watching how wee ones can experiment and test out a material. You may come up with lots of other ideas that we haven’t included.

Botanic Gardens Collaboration

Inspired by the current exhibition at the DCA by Stuart Whipps, we have collaborated with the University of Dundee Botanic Gardens to offer families from Homestart and Dundee International Women’s Centre free visits and creative activities when they are there.

There is now an amazing mud pit for wee ones to explore, try out some messy play, and use their imaginations to create small muddy worlds.

And we have left activity packs with ideas for mud painting, creating rubbings and making art from leaves.


Happily the mud area is open to any visitors to the Botanics and you can now also pick up a worksheet with a rubbing hunt, crayons and a hedgehog to create with leaves from reception so please do visit with children and have a shot. The botanics is such a beautiful space to visit and the mud area is in a lovely cosy greenhouse so it’s perfect if the weather isn’t great.

We have also made 0-3 activity packs for the DCA create space which tie in to the exhibition. The Create Space is free to book for your family during your visit to DCA and you will be able to play and try out the packs. You can book online through the DCA website here

https://www.dca.org.uk/whats-on/event/create-space

Art at the Start and Dundee Science Centre

All this week Art at the Start, DCA and Dundee Science Centre have teamed up to do science and art activities, all themed on art and looking. You can find them all on the science centre’s home learning portal here

www.dundeesciencecentre.org.uk/early-years-week

You’ll find some colour theory, optical illusions, remembering games and more. There are also links to older ones activities that connect with previous exhibitions at DCA.

Lights and Shadows

This week we are making art from light and shadows. This activity is very easy, needs only things you will have at home and makes no mess. It is also a really nice direct way for little ones to see how their actions have immediate effects; as they move about, their shadows move. This is a way to help them learn that they can take actions which do the things they want and that they have control over events or actions, what we call ‘self efficacy’ and ‘agency’. Both of these can help build their sense of self. This game is also nice for relationships as you can make up stories together and have each others shadows interact. For babies the high contrast of black and white is engaging. As always this activity is designed to be done together so don’t leave unsupervised children with lights.

you need:

  • some white fabric like a sheet or a table cloth spread out between 2 chairs so there is a space where you can go behind the sheet.
  • a spotlight, table lamp or torch aimed at the sheet
  • a darkened room
  • hands for making puppets and maybe some toys that will cast good shadows or card from your recycling to cut out your own.

Start by shining the light onto the front of the sheet and then you can sit in front and show wee ones how they can use their hands to cast shadows onto the fabric. You can play about at trying to make your hands look like animals. The easiest is to use your fingers to make some kind of beak or mouth and then your puppets can talk to each other. Or just see what different effects you can create together.  Show them how putting their hands nearer or further from the light can change the size of the shadow. Babies especially will be happy to just look at the high contrast visuals they are getting from the shadows whereas toddlers and pre-schoolers might want to develop more of a story or ‘show’.

Once wee ones understand how it is working you could move the light behind the sheet to make it into more of a puppet theatre if you like.  You could take turns showing each other an idea or get siblings involved in putting together a story for you to watch. Our pre-school aged tester really liked to have his ‘show’ filmed on a phone so he could then watch it back but sometimes you might prefer to just stay in the moment and focus on the game together.

You might like to add to your range of puppets. What about making some extra features from card to hold in their hands like we make an extra snake tongue here. Or you can add in some of their own toys to hold up and see what they create as a shadow. We are using play mobile figures and trees here. If you want to be really fancy you can use sticky tape to tape some toys to chop sticks so there is a handle to hold and it’s easier for them to keep their own shadow out of the way.

There are lots of different possibilities so have fun experimenting and seeing what engages little ones’ imaginations.

Footprint trails

When painting with wee ones we seem to make a lot of footprints. This is great as they like the feel of the paint on their feet and it’s also a quick way for them to see their impact in the world through mark making when they stamp down their print. It’s also nice to keep prints to see how they are growing. If you are looking for something else to do with all those footprints then try this trail idea to turn them into a game.


You need:

  • Paper
  • Paint (or you could draw round feet in pen and cut out instead)
  • scissors
  • covered floor


Start by painting wee ones feet or having them step into a tray of paint and then pressing their feet down onto paper. It’s a good idea to have an old towel ready to wipe off on or a bowl of water ready so it doesn’t get spread through your house. You can make as many footprints as you can, the more you have the better.

Once they have dried you can now cut out the footprints. If you have toddlers or pre-schoolers they could help you with this but it’s also fun to do it secretly after bed time so you can set up the trail as a surprise. If you don’t have enough footprints you can also cut round some to create extra. Once you have a big handful lay them out round your house or garden as a trail for them to follow. At the end you might want to hide a toy animal or have a little treat to find.

Children will enjoy recognising that it’s their own prints which have made the trail. You can play at having them jump from print to print or you can space them out a bit further so they have to hunt. If you ask them to do the trail backwards after they’ve found the end then you can keep the prints for another day. We’ve done this trail every day this week so far in different places as it was very popular. I had to stop leaving jaffa cakes at the end and switch to cuddly toys!


Colourful foam

This idea came from our friend Laura and my Art at the Start guinea pigs have been loving it! It’s a really nice way to get super messy with lots of lovely sensory experiences of foamy sloppiness for wee ones but it is still easy to clear up because it’s mostly soap.

You need:

  • water based, non-toxic paints (you could also use a drop of food colour but remember it stains if you’re letting wee ones help you mix)
  • something soapy – we used washing up liquid here but you’d be better to use your child’s normal bubbly bath as then you know it won’t irritate their skin and will be safe if they lick it
  • a blender

Just put a cup of water, a squirt of paint and a squirt of your chosen soap into a blender. Put the lid on and wizz it up. It will grow to fill the jug. Toddlers can help with the measuring and wizzing and will enjoy seeing the mixture instantly go from tiny to massive! With babies you can make it yourself in advance.

Now you can do a few different colours and pour them one at a time into a tray in a rainbow effect. Or you can let your wee one do it and end up with a crazy pattern like we did! You could make up a smaller amount of this foam and put it in a baking tray or shallow dish to play with from a high chair or we put several colours together into an under-bed storage tray to get right in. It is fun mixing the different colours up with your hands although this does often result in it ultimately turning mudgy beige! If you wanted to introduce some learning about colours why not try making just a couple of colours like yellow and red or yellow and blue so wee ones can see what new colour is made when they mix.