Playful Gardens Report

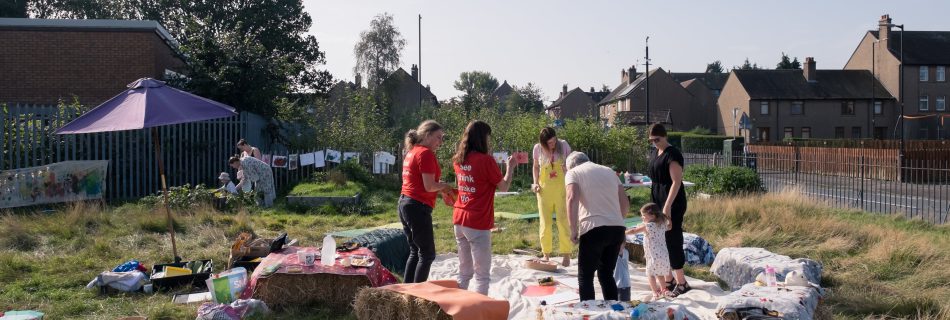
We were delighted to be involved in running Playful Gardens in 2022, along with NHS Tayside, Barnardo’s, DCA, Scrap Antics, Dundee Botanic Gardens and lots of other amazing organisations who joined in. You can read our repot on this pilot project to offer inclusive family play days below.

Please wait while flipbook is loading. For more related info, FAQs and issues please refer to DearFlip WordPress Flipbook Plugin Help documentation.

Tip for viewing: Make the report full screen by clicking on the expand toggle on the bar above and then click on the right arrow to flip the page

We’d like to thank Tay Radio’s Cash for Kids and University of Dundee Festival of the Future, whose generous funding made the Playful Gardens days possible.

Snowy sensory play and painting

With winter weather outside we were using the snow as a prompt for our sensory play and art making today. It is probably too cold for very wee ones to spend much time outside this week so this is a nice way they can join in. As always, let them lead the exploration and show you what they are interested in.

For our sensory tray we made cornflour snow. This is a nice recipe as it is safe to taste and has an interesting texture. It can pack tightly into balls, or to build walls and domes in the sensory tray, but then it easily crumbles back up to be soft and fluffy again. It even makes the same crunchy sound as real snow. To mix it, use enough cornflour to fill a storage tray or baking tray (maybe a few boxes will be needed). Then drizzle in sunflower oil slowly, mixing as you go until the flour stops being powdery and fly away and starts to hold together. It usually takes about half a cup of oil for a box of cornflour. You can also use baby oil for whiter snow, but only if they are big enough not to try eating it.

We added a mixture of snowy animals like mammoths, penguins and polar bears to our snow as a prompt to play, or you could add spoons and scoopers, cups for making mini snow domes, or natural materials like bits of pine.

In our session the wee ones were enjoying getting right into the trays. Luckily it washes off easily and the oil leaves their skin nice and sfot!

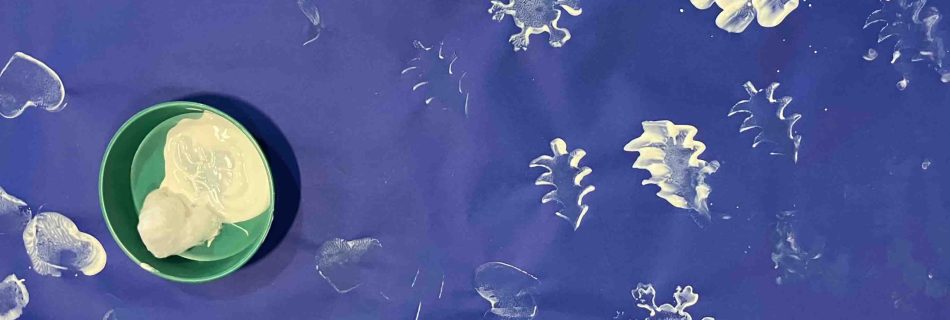
For paintings we offered large blue rolls of paper (you could use any size) and trays of simple white paint. We had fluffy cotton balls for printing with, along side some sponges and stampers. The cotton balls are fun as they can explore the soft texture and see how it changes after adding paint. They can use it to stamp snow marks or throw them onto the paper for a splat. If you don’t have white paint, you can make a simple white paint with just cornflour and water heated and mixed to a paste. See the recipe here.

Tactile art ideas

We had a lovely session this month with the Guide Dogs Children and Young People Service joining families in Edinburgh for their My Time to Play Group. This got us thinking about art making ideas that are tactile and use lots of different senses. The ideas would be ideal for wee ones with visual impairment but also bring some nice sensory experiences to art making for everyone.

We tried some of our favourite activities from the website like coloured rice trays and you can find a recipe for that here. We also tried printing using paint and different textures like corrugated card and bubble wrap. The feeling of sliding the paint over the bubble wrap is really nice. You can find instructions for the bubble wrap printing here.

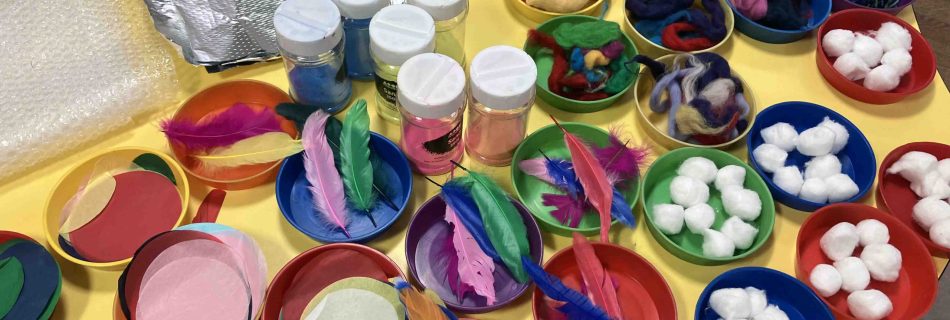
We tried a new way of using our collage materials that allowed wee ones to feel all the different textures of the materials and then really easily and immediately (without much mess) stick them onto their art work. You need a square or rectangle of thick card which you then wrap with wide sticky tape or parcel tape, using the tape inside out so you are creating a sticky outside surface. You could also use a sheet of sticky backed plastic for this but tape is easy to find. This creates a surface that is tacky to touch that wee ones can explore and anything they add to it will easily stick on.

Offer wee ones a range of interesting different textures. We used things like feathers, snipped up wool, cotton balls, tinfoil, tissue paper and pompoms. You can see some of our materials in the image at the top of the page. If your baby is still putting things in their mouth make sure everything is safe and too large to swallow. Let them explore all the different feelings and then choose what they woudl like to stick on. We used a shake of coloured sand at the end to fill in any sticky gaps and add another texture. The final art works were interesting to explore with fingers.

First Painting

Art making together can bring so much joy to very young children and their grown-ups. And while you make art together, you and your baby are also sharing something important.
Making art together builds wonderful moments of connection between babies and their grown-ups – these moments are the key building blocks of strong relationships and self-esteem. By responding positively, your baby learns that the ‘mark’ they make on the world will be positively received.
Playing with art materials also gives young children new and stimulating sensory experiences. By helping your baby enjoy these experiences, you are teaching them not to be afraid to explore the world.

It can be hard to know where to start making art with very small children so here are some suggestions on how to get going making your first paintings together. Don’t worry about how it looks and just enjoy the process of exploring the paint together.

All art materials need supervision – never leave young children alone with art materials – our activities are for doing TOGETHER

Photographed by David P Scott. www.davidpscott.com

Set Up

Get everything out that you might want before you begin – baby wipes, old towel, art materials, extra paper. Cover the surface you are using with a plastic mat, oil cloth, or newspaper.

Use the floor or table, wherever you will be most comfy together. We like to work on the floor, all of us at baby level, so they can use hands and feet, but it can also work well to sit at a table with a baby on your lap, or with them in a high chair. Painting out in the garden is perfect in the summer and you won’t have to worry about mess.

Remember to put wee ones in old clothes or just a nappy (babies are much easier to wash than their clothes!). Put something old on yourself so you can still cuddle a painty baby.

Tip:
Run a bath that’s a bit too hot before you start so it will be perfect by the time you finish, and they can just go straight in.

Materials

Paint is best for easy mark making and versatility. Go for thick water-based paint, usually called ‘ready mix’, ‘poster paint’ or gouache.

Hands are all you need for painting.

If you want to try brushes, make sure they are chunky to be easy to hold and won’t fall apart. We pop our brushes in bottle steriliser between sessions or you can run them through a dishwasher, as they often get sucked on.

Other fun ways to spread paint are rollers or sponges.

Plastic plates or cupcake tins make great paint trays

You can also try home made paints based from food stuff. You can find some ideas here.

Paper which is thick enough not to fall apart when wet, and absorbent enough to take paint easily is best – like paper called cartridge or sugar paper rather than thin photocopier paper. You can add in some recycled drawing surfaces. Try opening out cardboard boxes or using newspaper or old book pages for a fun effect.

Tip: As lots of wee ones are going to put everything in their mouth, make sure materials are baby safe by choosing non-toxic products. If you are unsure about what you are using, you can always email the company to ask. Lots of paint manufacturers say 3+ on their paint due to the small parts in the lid, but if you check with them, the paint is non-toxic and safe to go in their mouth, keep the bottle up high and put paint out in trays or on plates for them. We use companies like Baker Ross, Hope Education and Specialist Crafts and these all allow online ordering.

Photographed by David P Scott. www.davidpscott.com

Making their first marks

Little ones will enjoy exploring the texture of the paint and seeing what they can do with it. If they have never felt paint before they might be surprised and take a little while to warm up to it so allow them to explore it in their own time.

The easiest way to get started painting depends a bit on age.

For small babies try letting them lie on their tummy and put a sheet of paper where you have already put out a few blobs of paint in front of them. This will let them reach out and feel the paint and then start to move it about on the paper. You often end up with rainbow shaped paintings as they sweep the paint with their arms.

Photographed by David P Scott. All rights reserved. www.davidpscott.com

Older babies might like to paint this way too, or they might like to sit between your legs so you are propping them up to explore with hands and feet. Or they can sit on your lap at a table. You could try helping them to dangle their feet into the paint.

Photographed by David P Scott. All rights reserved. www.davidpscott.com

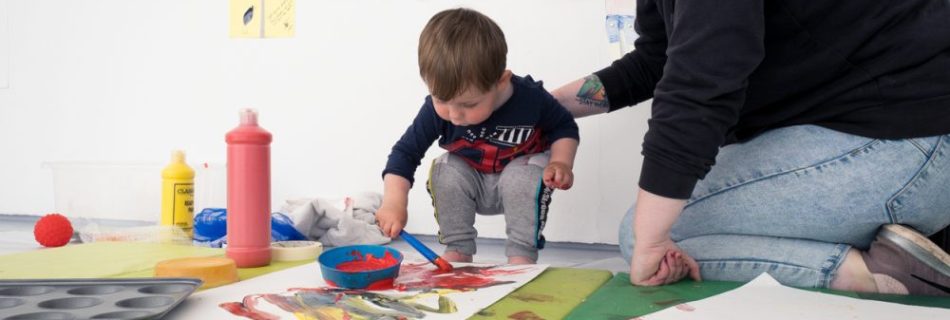
Toddlers might like to see the paint all laid out in the paint tray for them and they can be offered brushes or just their fingers to put it on the paper.

Have a shot yourself to show little ones the idea of making a mark on the paper. Let them explore and see what they come up with. And if they are not a fan today, don’t worry, just try again another time. Follow their lead for when they have had enough (tiny ones will not last long) and then move to bath time. If you can pin up their paintings, they might like to look at them and talk about what they made.

Hand and Foot Prints

There is no more direct way for wee ones to make their mark than with handprints or footprints. It’s nice doing prints like this together as the brushing on of the paint is a nice sensory experience for little ones, as well as seeing the impact of the mark they can make when they stamp it down.

If you spread some paint over the large tray or a plate, that will let little ones put their hands or feet right in. Or you can paint onto their hands or feet with a brush then let them print it onto the paper.

Photographed by David P Scott. All rights reserved. www.davidpscott.com
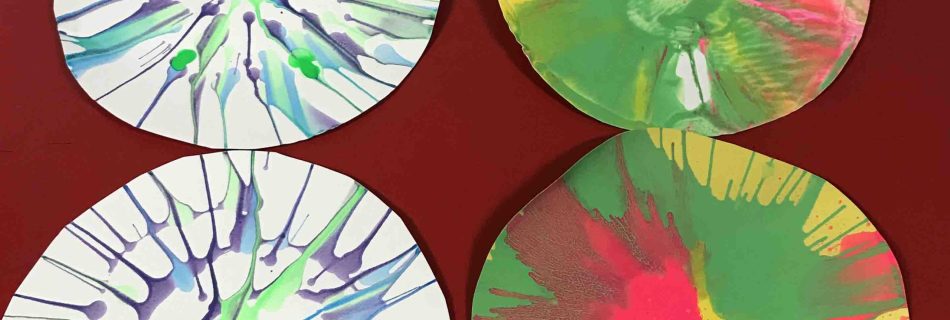
Image of circular paintings with paint spraying in a spin pattern

Process Art – dripping, squirting, spinning

We had families back in DCA this week with their little ones and we were trying lots of different process art ideas – where the final result is a bit of an experiment using spinning or gravity to help us. These are lots of fun for big and small as everyone can enjoy the un controlled outcome. It does get a bit messy though so put plenty of paper down (or even try it in the shower!)

Spinning:

We used salad spinners to create these spin paintings. You need an old fashioned salad spinner (available in charity shops or cheap online) or you can also try with a record player or a ‘lazy susan’. Cut a circle of paper that fits into the base. You now need to help your little ones to drip paint onto the paper. Mix water based paint 50/50 with water to make them runnier. We put out paint into little mustard bottles so wee ones could squeeze them out themselves. Or you could put the paint in trays and use a dripper or medicine syringe to suck up the paint and let them drip it.

Now put on the lid and spin!

We had some amazing results

Dripping:

We also had lots of fun testing out different ways of dripping the paint. We had hung sheets of white fabric ready to drip onto but you could also tape paper to the side of the shower or to an outside wall.

Have some different methods of dripping the paint. We used drippers and medicine syringes again with our paint watered down 50/50. We also tried painting on thicker blobs of paint and then spraying them with water from a spray bottle till it ran down the fabric. This gave a really nice effect and is good for letting little ones experiment and see cause and effect. It’s also a bit safer in the house as they are only ever spraying water. If your wee one enjoys this they might also like to try our rainy paintings.

Squirting:

We tried putting large sheets of paper onto the floor and using the same drippers and syringes to squirt the paint from a height to get a fantastic splatting effect.

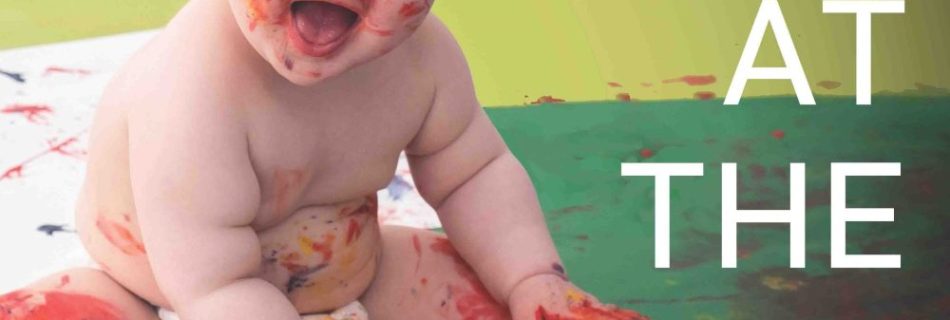
Book cover image of a baby painting

New Art at the Start book!!!

We have been working with some amazing families to develop the ideas from our Home Art box project into a book, to encourage more families to try art making with their very young children. We have been testing and co-designing the activities with the families and a great photographer, David P Scott, has been capturing images. The first versions of the book are now ready and it’s looking amazing!

Photographed by David P Scott. All rights reserved. www.davidpscott.com

We are going to be giving out 200 copies along with the art materials to get started to families across Dundee with our charity partners and through library book bug sessions and Dundee Botanic Garden open days. The Universities’ Festival of the Future has made this launch possible by funding bags of art materials.

art materials

We really hope this book will reassure parents that art is possible with even the tiniest babies and encourage them to have a shot. We are always emphasising that art making with wee ones is about the process of exploration not the final product and there are so many benefits from giving it a go. And it is really fun for the wee ones and the big people too!

Photographed by David P Scott. All rights reserved. www.davidpscott.com

This book has been made possible with funding from the University of Dundee Impact and Development Fund and the Scottish Graduate School for Social Sciences Impact Award.

Flower Pressing

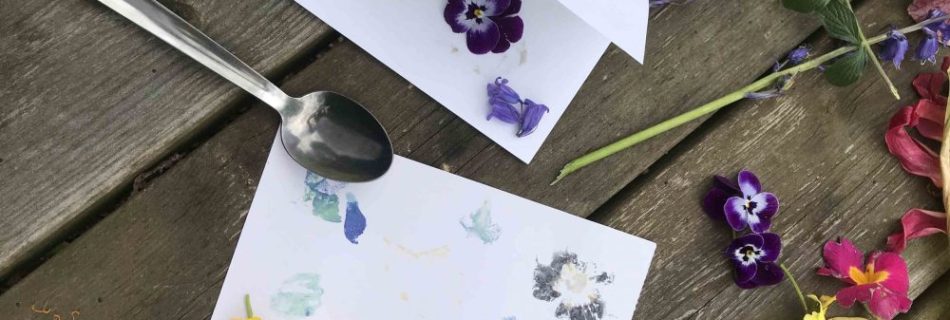
We were visiting the beautiful Dundee Botanic Gardens this week with a group of families from the International Women’s Centre. We did several outdoor art activities and here is a nice one to try in a garden at home or on a walk. This flower pressing is a good way of trying mark making for wee ones without traditional materials and with no skills required. You are making a print using the natural colours contained within the plants. They make nice cards afterwards and children will like the surprise of seeing what they get. Remember to only pick plants where you have permission and when you know they are safe. Pansies, marigolds and roses are a good place to start for taste safe petals.

You need:

  • Paper – thicker more absorbent paper works best
  • Flowers and leaves
  • Spoon for rubbing (or a rock to bash with)

Start by gathering some colourful flowers or leaves. Different petals will give different amounts of colour so experiment a bit. We found we got the brightest prints using pansies whereas tulips which looked very colourful didn’t give a nice strong colour once pressed.

Now fold a sheet of paper in half and help wee ones to lay out their flowers in a pattern.

Fold the paper over and show them how to rub over the paper with a spoon. You need to rub quite hard. If you were out and about with tools you can also get the same effect by bashing the flower between the paper with a stone. Some wee ones might find this even more fun!

Once they have rubbed all over the back you can open the paper and let them peel of the squished left overs of the flower to see the print beneath. They can keep going adding flowers till they are happy with the design.

If you want to turn the art works into a card you can just flip the paper fold the other way so the print is on the outside.

Eid Marbled Moon and Stars

Together with the Dundee International Women’s Centre Flourish group, we are using shaving foam marbling to make Eid decorations with moons and stars. Kids will love getting messy with the shaving foam and the whole family can get involved. Wee ones will need help when we get to the scissors.

If you want more help with marbling you can watch our youtube video here: https://youtu.be/AeTR5apHayI

or the whole craft is here: https://youtu.be/rV3QJUuIIzA

You need:

  • Thick paper or card
  • Water based paints
  • Glue stick and scissors (keep out of reach of little ones)
  • Plastic card (like a credit card)
  • Chopstick or lolly stick
  • Thread to hang
  • Baking tray
  • Template for moon and stars on this pdf

● Squeeze foam into a tray and spread it out with a plastic card. Now drip 2 or 3 colours of paint over the surface. We used orange paper in yellow and red marbled paint for stars and blue paper into navy and purple paint for our moon.

● Now use the chopstick to swirl the paint around into a marble pattern. Don’t over mix it so the colours stay bright. Gently press paper into the mixture to transfer the print, lift up and scrape off the extra foam using the plastic card again. You can do several prints from the foam if you spread it back out again. Leave these marbled papers to dry.

● Cut the templates from cereal box card and use them to cut out your marbled papers. Make 2 of every shape you want so you can glue them back to back for strength and to look nice from both sides. We made a moon, 2 big stars and 3 small stars.

● Now thread the stars below the moon. We used a hole punch but you could also use tape or glue. Now you can hang it up somewhere and enjoy.

Art Boxes

Over the Covid-19 restrictions Art at the Start have been sending out boxes of art materials and ideas to try at home to vulnerable families. The first 50 were funded by Vicky’s School of Social Sciences research budget and then we were lucky to win funding from the University’s Public Engagement Seed Fund to do 100 more. The boxes contained everything that families with young children would need to try 12 different creative activities and were designed to encourage positive interactions and help wellbeing during the pandemic.

A report looking at our preliminary findings from interviews with parents who received a Home Art Box has just been published. We saw several benefits including increased parental confidence to make art together and increasing connections between parent and child.

Our report – ‘Art boxes supporting parents and infants to share creative interactions at home: an art-based response to improve well-being during COVID-19 restrictions’ – is published open-access in Public Health and is free to read here: https://www.sciencedirect.com/science/article/pii/S0033350621000536

We are really happy that the Art Boxes are continuing to develop and receive interest. We have done follow up packs with the International Women’s Centre and are now working with Amina, funded by the People’s Postcode Lottery so we can continue to reach local families. We are also looking at adapting boxes beyond the pandemic and creating a book resource based on all the ideas and the feedback from families.


Paints on snow

Snow Painting

The snow is providing lots of opportunities for wee ones to have creative fun outside. If you are bored of snowmen try some snow painting. This is relaxed as a parent as you don’t need to worry about mess outside and it’s so simple to set up. This activity is nice for babies and toddlers as the colours look extra vibrant on the snow and they don’t need to press hard to get a strong mark. It’s also a sensory experience to feel the snow and see it melt in the paint. Just wrap up warm!

painting onto snow

You need:

  • Water based paints (or you could use food colouring)
  • Brushes or spoons
  • trays or bowls
  • Snow!

Chose some brightly coloured paints and mix them with the same amount again of water as they will be easier to play with if they are runny. Make sure paints are water based. Now set them up on the snow with either brushes or spoons and invite wee ones to explore them and see what marks they can make.

You could try showing them how to brush it on gently, or dab and make coloured holes in the snow, or splatter it from a height.

splatting paint into snow
coloured paint poured onto snow

We also tried adding the snow into the paint pots once there was enough space and this worked well to mix up and make coloured snow castles or to roll into a ball for coloured snow balls.

With some extra bowls and toy cooking sets this could become a fun ‘snow kitchen’ activity mixing up pretend food or potions.

Have fun experimenting together!